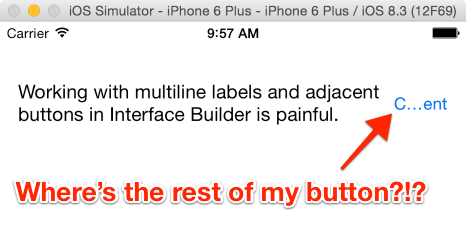
You’re designing your UI with Auto Layout in Interface Builder, and you feel like throwing your Mac out the window.

Auto Layout is supposed to make it easy to put views where you want them, right? But you’ve laid out your views in IB, added your constraints… and your button is being crushed by the label that’s next to it. You take Xcode’s advice and change the button’s horizontal hugging priority to 249 – to no avail. You tweak the content hugging on the label – and still, nothing. You try various combinations of values for compression resistance and content hugging on both the label and button – until you’re forced to admit defeat and call it quits. Again. You just lost another afternoon of billable work, and your client isn’t going to settle for a button that’s only half visible. If you don’t get this fixed soon, you’ll lose the project.
You’ve heard that Interface Builder makes it easy to design the UI for your app with Auto Layout. So why do you feel like you want to ditch Auto Layout completely?
What if you could quickly design beautiful UIs with Auto Layout in Interface Builder?
What if you could become a master of Auto Layout in Interface Builder? Imagine being able to build a screen that looks exactly like the design – in a matter of minutes. You’d trust yourself to design a UI in IB without depending on Xcode’s flaky suggestions. Your client constantly tells you how amazed they are with your quick turnaround times and how they’re “blown away” by how beautifully you built their app. They can’t help but brag to their friends and colleagues about this “awesome iOS developer” they found – you. And when the project ends, they’ll do everything in their power to keep you around – or send you on your way with glowing referrals. And you’ll have a beautiful portfolio piece you can show off to those prospects.
Auto Layout in Interface Builder can be frustrating, confusing, and time-consuming, especially when you’re first starting out.
Beginning Auto Layout in Interface Builder will help you skip over the frustration so you can finally reach the point where you can build your app’s UI in minutes instead of hours.
You can learn to build beautiful UIs with Auto Layout in Interface Builder
And to get there, you need to learn a few things, like:
- How to lay out and position images, text, buttons, and more
- How to reposition views and change fonts for different device sizes and orientations using size classes
- How to scale a view based on device size with proportional constraints
- How to keep your views from being squished or bloated using compression resistance and content hugging
- How to lay out and size table header views and table view cells
- How to build screens that expand and contract based on device size
You’ll learn all of that in Beginning Auto Layout in Interface Builder, and you’ll go from relying on Xcode’s “Add Missing Constraints” button to trusting yourself to add the constraints you need to make your views look perfect on any device.
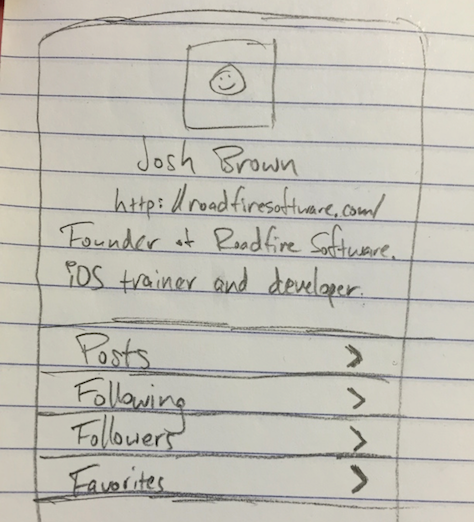
In less than an hour, you’ll take a sketch like this:

and turn it into a screen like this:

And you’ll continue building your skills with each subsequent lesson. By the end, you’ll be confident in your ability to impress clients by turning their design into a beautiful UI.
You’ll be able to:
- Lay out and dynamically size custom table view cells and headers so your table views always look right
- Keep your views from being squished or bloated using compression resistance and content hugging
- Build beautiful interfaces that expand and contract based on device size
- Control the size of views with more precision using inequality constraints
- Configure your user interface to respond to multiple device sizes and orientations
Start Mastering Auto Layout in Interface Builder now
Get a free preview of the course now, delivered to you via email over the next two weeks. And when the course is ready, you’ll be the first to hear about it.