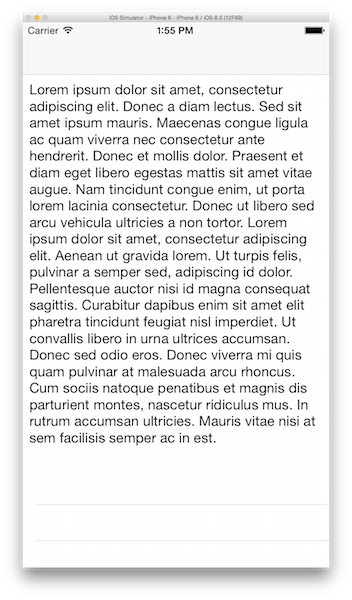
If you’ve tried to create a table header view in Interface Builder, you may have noticed that it doesn’t size properly even when you have all the right constraints. Here’s what happens if you just set up your constraints:
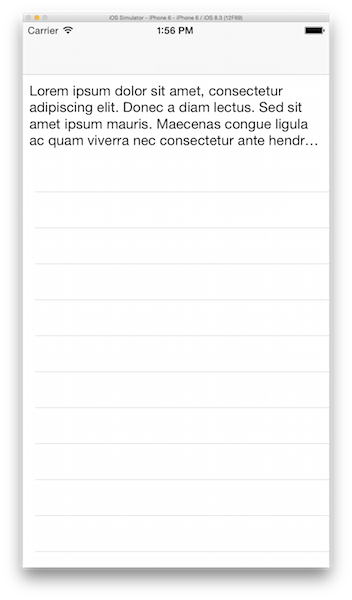
Even though all the constraints are set properly on the table header view, its height is clearly wrong since we want to show the full text in the label. And yes, its numberOfLines is already set to 0. So what can we do?
The solution
The solution is pretty simple, even if it isn’t so easy to discover. We’ll start from the very beginning, but if you’re confident with your constraints and connections already, skip ahead to Step 9.
1. Add a table view to your view in Interface Builder
Drag a table view onto your view and position it so it fills the screen. Nothing special here.
2. Set the constraints on the table view
Add constraints to the table view so it’s pinned to each edge of the screen (making sure, as always, to uncheck “Constrain to margins” first) – so it’ll stretch to fill the full screen on any device.
3. Connect the table view to the ViewController
Connect the table view from the Storyboard to your ViewController as a new IBOutlet.
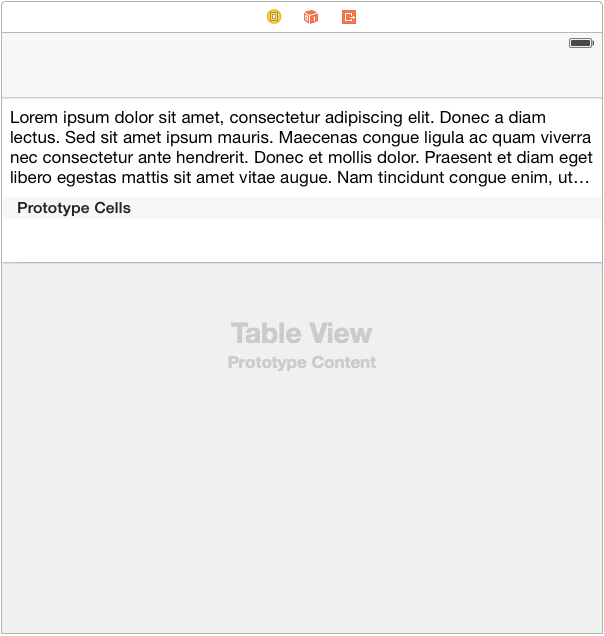
4. Add a table header view
To add a table header view, grab a view and drop it near the top of your table view. (You can create your header view in a XIB if you prefer – the problem and solution are the same.)
5. Drop a UILabel onto the table header view
Grab a label from the object library and drop it onto the header view. Use the guides to position it 8 points from each edge of the table view. Make sure to drop some long text into your label, too.
Like so:
6. Set the constraints on the table header view
Use the Pin tool to set the label 8 points from each edge of its superview.
7. Create a CustomHeaderView class for the table header view
Create a CustomHeaderView class that subclasses UIView. In the Storyboard (or XIB), set your table header view’s class to CustomHeaderView.
8. Connect the label to the CustomHeaderView with a new IBOutlet
Create a new IBOutlet in your CustomHeaderView class:
@IBOutlet var label: UILabel!
Then click and drag to connect it to the label in Interface Builder.
9. Implement layoutSubviews() in CustomHeaderView and set the label’s preferredMaxLayoutWidth
This one of the major pieces – we need to make sure the preferredMaxLayoutWidth is set properly on the label. This is what allows the label to grow or shrink to the proper height with Auto Layout. I’m not sure why this doesn’t get set automatically like it should on iOS 8, but labels don’t seem to size properly in table views unless you set the preferredMaxLayoutWidth explicitly. Luckily, we can get the proper width to use in layoutSubviews().
Override layoutSubviews() in CustomHeaderView, making sure to call super, and set the preferredMaxLayoutWidth on your label:
override func layoutSubviews() {
    super.layoutSubviews()
    label.preferredMaxLayoutWidth = label.bounds.width
}
Notice how we’re not doing any calculations or anything special – the label’s bounds are already set for us, so we just need to set the preferredMaxLayoutWidth to the label’s current width in layoutSubviews().
10. In the ViewController’s viewDidLayoutSubviews(), resize the header view
Now we need to resize the header view to allow all of the label’s text to fit inside it.
(Update: Thanks to Istvan Balogh for pointing out that this should be done in viewDidLayoutSubviews() – not viewDidAppear(_:) like I originally suggested.)
Here’s how I did it in my ViewController:
override func viewDidLayoutSubviews() {
    super.viewDidLayoutSubviews()
    sizeHeaderToFit()
}

func sizeHeaderToFit() {
    let headerView = tableView.tableHeaderView!

    headerView.setNeedsLayout()
    headerView.layoutIfNeeded()

    let height = headerView.systemLayoutSizeFittingSize(UILayoutFittingCompressedSize).height
    var frame = headerView.frame
    frame.size.height = height
    headerView.frame = frame

    tableView.tableHeaderView = headerView
}
Again, we’re not doing any calculations or anything special – we’re letting Auto Layout tell us the height that the headerView should be using systemLayoutSizeFittingSize(_:). And then we’re taking that height value and setting it on the headerView frame. And finally, we’re setting that headerView as the tableHeaderView at the very end to make sure the tableView has the updated headerView with the proper frame.
Et voilà – it works!