I’ve been updating apps for iOS 7 in addition to writing a book about it, so I thought I’d share what I’ve learned. If you’re updating apps for iOS 7 (and especially if you’re still supporting iOS 6), read on. I hope you learn something here.
Why your views are hidden beneath the status and navigation bars (and what to do about it)
If you had an app that was built with the iOS 6 SDK and recently tried to build it with the iOS 7 SDK, you may have noticed that the tops of your views were hidden by the status bar and navigation bar like this:
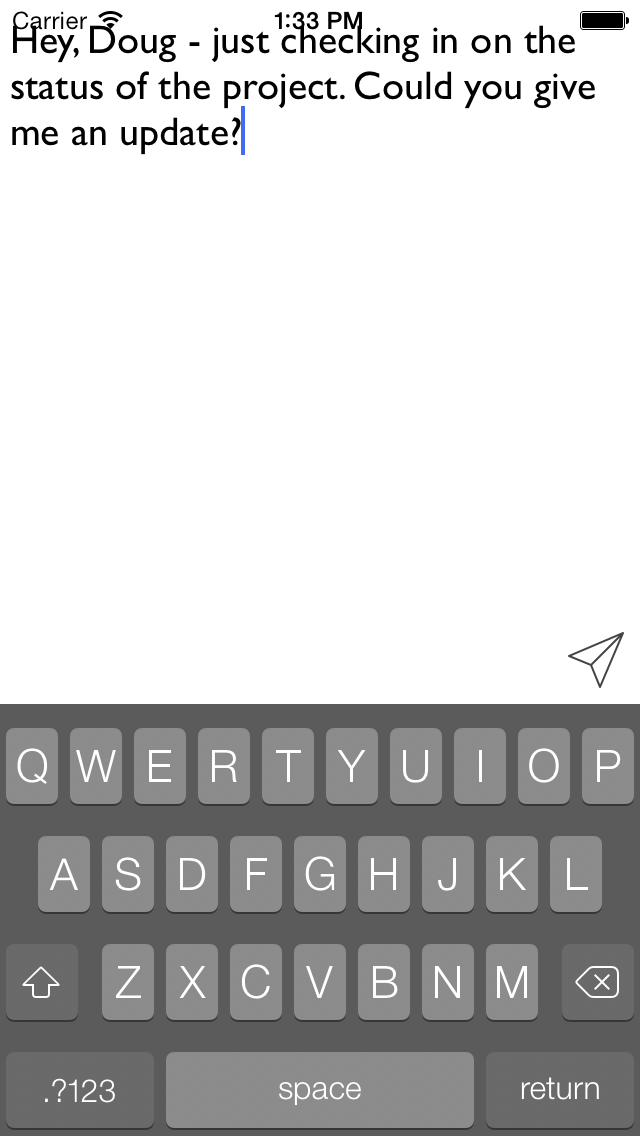
You can thank Apple for the translucency effect in iOS 7, where the status bar and navigation bar appear to be translucent. The real problem is that they’ve changed the height of the view – the top of the view on a UIViewController used to be at the bottom of the (opaque) status bar. Or if you had a navigation bar, too, the top of the view was positioned at the bottom of that. Not so any more – Apple wants views to appear underneath the status and navigation bars, especially when scrolling as in a scroll view or table view. Here’s how you can determine the height of those if you’re supporting both iOS 6 and 7:
- (CGFloat)topOfViewOffset
{
    CGFloat top = 0;
    if ([self respondsToSelector:@selector(topLayoutGuide)])
    {
        top = self.topLayoutGuide.length;
    }
    return top;
}
The respondsToSelector verifies that yes, indeed, we can call the topLayoutGuide method on our UIViewController. We need to do this check since topLayoutGuide is new to iOS 7 and your app will crash if you try to call it on iOS 6. If your target is iOS 7, no need to create a topOfViewOffset method – you can just call self.topLayoutGuide.length in your view controller.
I’m supporting iOS 6, so I’ve added the above method to a category on UIViewController which saves me the trouble of copying it to every single one of my view controllers. I can just import that category and do this in my view controller:
- (void)viewDidLayoutSubviews
{
    [super viewDidLayoutSubviews];
    self.textView.frame = CGRectMake(0,
                                     self.topOfViewOffset,
                                     self.textView.frame.size.width,
                                     self.textView.frame.size.height);
}
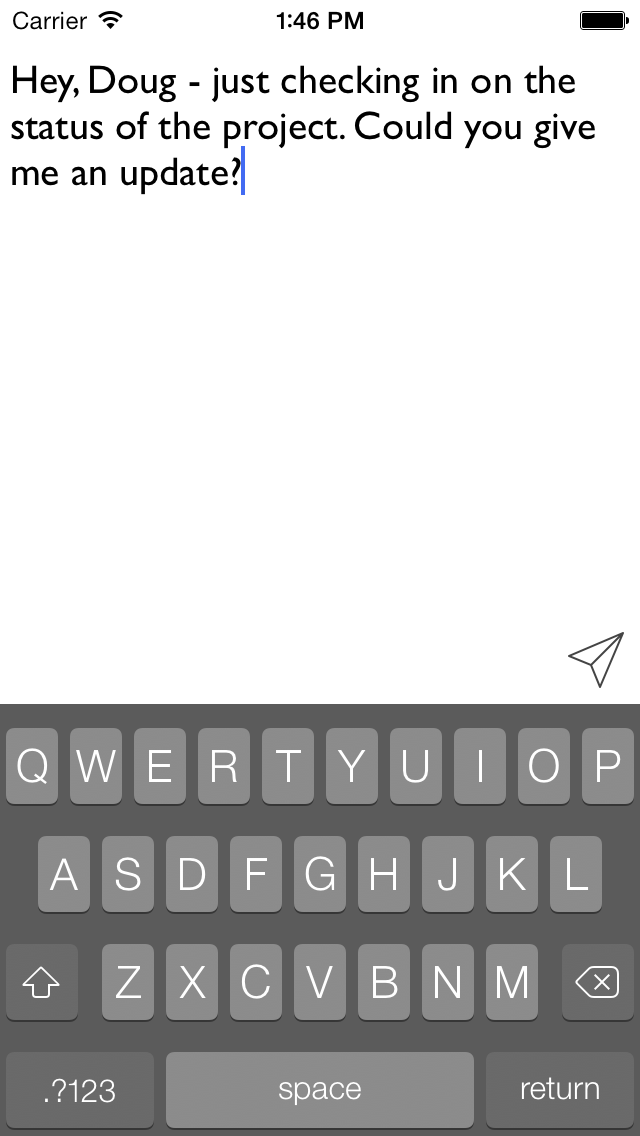
This positions our text view where we want it – 20 points (self.topOfViewOffset) below the top of the view.
Make sure to call topOfViewOffset (or topLayoutGuide) in viewDidLayoutSubviews, not in viewDidLoad or viewWillAppear. Stuff’s all wacky in viewDidLoad and viewWillAppear – calling topLayoutGuide.length in either of those returns a big fat 0.
Hiding the status bar
If you want to hide the status bar, just implement this method in your view controller:
- (BOOL)prefersStatusBarHidden
{
    return YES;
}
Fixing broken table views
Headers
Table views in iOS 7 can’t return 0 from -tableView:heightForHeaderInSection for a grouped table view (UITableViewStyleGrouped). Try switching to a plain table view (UITableViewStylePlain) if you don’t want a header. In iOS 7, both table views appear nearly the same visually, so you’re not out much by switching to plain.
Delegates and Data Sources
Make sure to nil your delegates and data sources on table views, too. (Thanks to Stuart Hall for pointing this out.)
- (void)dealloc
{
    self.tableView.delegate = nil;
    self.tableView.dataSource = nil;
}
Scrolling issues
I couldn’t figure out why my table views weren’t scrolling to the top like they used to. Previously, I was doing this to scroll a table view to the top programmatically:
[self.tableView setContentOffset:CGPointZero];
Guess what? That doesn’t work on iOS 7 – the table view content appears beneath the status & navigation bar. At least, that’s what it does if you have the contentInset set to a nonzero ‘top’ value.
So here’s how to scroll a table view to the top in iOS 7 if you have a contentInset set:
[self.tableView setContentOffset:CGPointMake(0, -self.tableView.contentInset.top)
                        animated:NO];
Pickers overlapping content
I had some pickers that were overlapping content in iOS 6. That was fine since the picker background was opaque – you could see it just fine (and it was usable). In iOS 7, the pickers have a transparent background, so that made for some pretty hard-to-read (and hard to use) picker values when there was something underneath. Setting the background color of the picker to white fixed the problem on iOS 7 (and didn’t break on iOS 6):
self.datePicker.backgroundColor = [UIColor whiteColor];
If you have pickers that are unreadable due to the transparent background, give this a shot.
Dismissing the keyboard
In a few view controllers, I was dismissing a keyboard on -viewWillAppear. That broke in iOS 7 (go figure…). So I tried calling -resignFirstResponder in -viewDidAppear which worked, but whenever I navigated to that screen in the app, I could see the keyboard for an instant before it was dismissed. It turns out that -viewWillDisappear is a good option:
- (void)viewWillDisappear:(BOOL)animated
{
    [self.textField resignFirstResponder];
}
So instead of dismissing the keyboard in viewWillAppear, try the above to dismiss it in viewWillDisappear.
New in iOS 7: Text to Speech
iOS 7 introduces Text to Speech with the AVSpeechSynthesis API. Using it is really easy:
AVSpeechSynthesizer *synthesizer = [[AVSpeechSynthesizer alloc] init];
AVSpeechUtterance *utterance = [AVSpeechUtterance speechUtteranceWithString:@"Hey there!"];
[synthesizer speakUtterance:utterance];
There are voices, volume, pitch, delegates, and more in this API. If you want to learn more, check out the docs or get yourself a copy of Developing an iOS 7 Edge. (Disclaimer: I co-authored it and it’s an awesome way to get up to speed on iOS 7. ;)
Conclusion
There’s a lot of new stuff in iOS 7, and a lot of changes to the way things used to work. Updating apps has been a struggle for me – especially in handling the translucent status and navigation bars – so I hope this saves you a ton of time.
Learn Swift with the 5-Part Guide to Getting Started with Swift by dropping your name and email in the boxes below.